
 Highlight
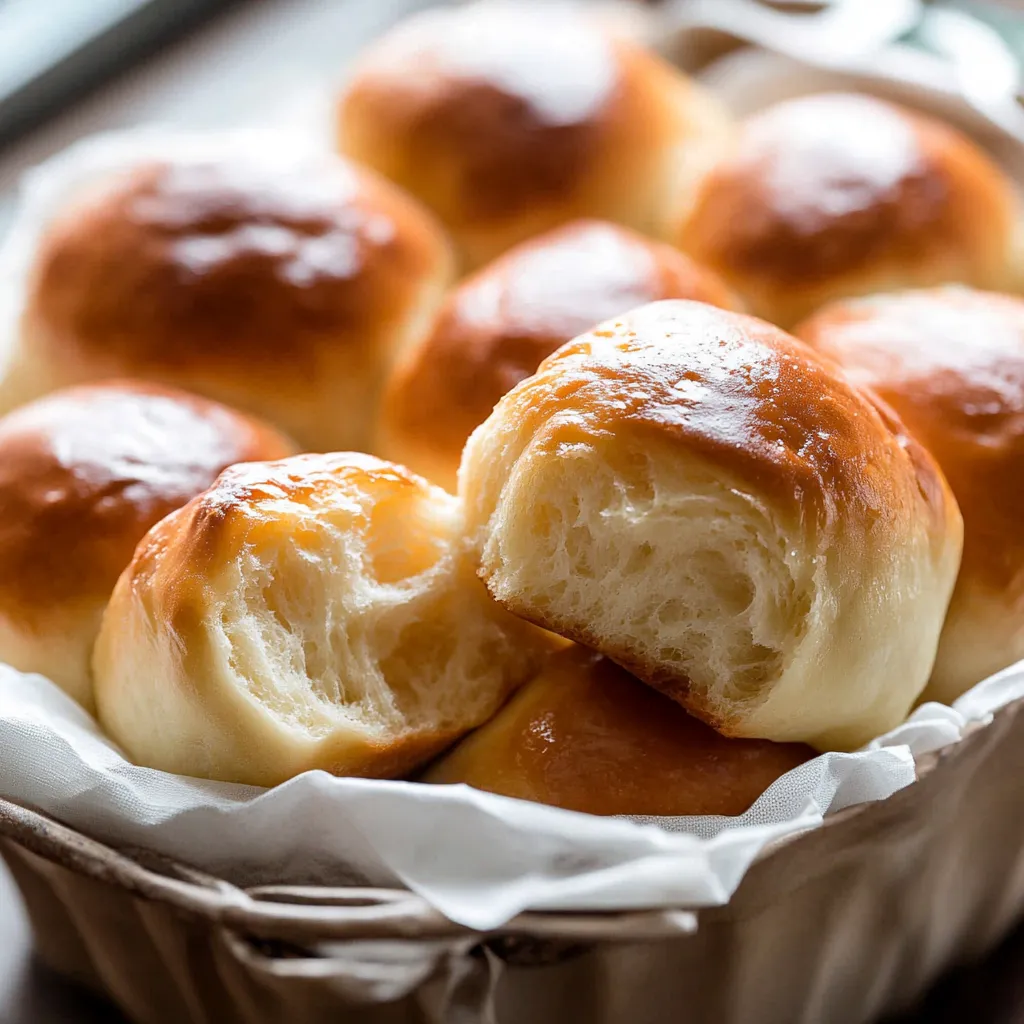
These soft dinner rolls melt in your mouth with their pillowy texture and buttery flavor. They've become my signature contribution to family gatherings where everyone fights over the last one. Nothing compares to the aroma of freshly baked rolls filling your kitchen as they turn golden brown in the oven.
I first developed these rolls when hosting my first Thanksgiving dinner. The recipe was such a hit that my mother-in-law actually requested the recipe which might be the highest compliment a home baker can receive from family.
Ingredients
- 1 cup whole milk warmed to 110°F adds richness and tenderness to the crumb. Use whole milk for best results as the fat content matters.
- 2 1/4 teaspoons instant yeast ensures reliable rising without the need to proof first. Platinum yeast from Red Star is my preference for consistent results.
- 2 tablespoons granulated sugar feeds the yeast and adds subtle sweetness. Don't reduce this amount as it's necessary for proper fermentation.
- 1 large egg provides structure and richness. Room temperature egg incorporates more smoothly into the dough.
- 1/4 cup unsalted butter at room temperature creates that irresistible tender texture. Be sure it's properly softened for easy incorporation.
- 1 teaspoon salt balances flavors and strengthens the dough structure. Table salt works perfectly here.
- 3 cups all-purpose flour or bread flour creates the foundation for these rolls. I prefer bread flour for its higher protein content which yields chewier rolls.
- Optional honey butter topping combines 2 tablespoons melted butter with 1 tablespoon honey for the perfect finishing touch. This glossy topping takes these rolls to the next level.
Step-by-Step Instructions
- Activate the yeast.
- Combine warm milk, yeast, and 1 tablespoon sugar in your stand mixer bowl. The milk should feel like warm bathwater on your wrist. Cover and wait 5 minutes until the mixture looks slightly foamy which confirms your yeast is alive and ready to work.
- Create the base dough.
- Add remaining sugar, egg, butter, salt, and 1 cup of flour to the yeast mixture. Mix on low speed for 30 seconds until roughly combined. Scrape down the sides of the bowl thoroughly to ensure even incorporation of ingredients.
- Complete the dough.
- Add the remaining flour and beat on medium speed for about 2 minutes. Watch carefully as the dough transforms from a shaggy mess to a cohesive ball that pulls away from the sides while still clinging slightly to the bottom of the bowl. The dough should be soft and slightly tacky but manageable.
- Knead to develop gluten.
- Continue kneading in the mixer for 5 full minutes or by hand on a lightly floured surface. The dough will become smooth and elastic. Perform the windowpane test by stretching a small piece until light passes through without tearing to confirm proper gluten development.
- First rise.
- Place the dough in an oiled bowl, turning to coat all surfaces. Cover with a kitchen towel or plastic wrap and let rise in a warm spot for 1-2 hours until doubled in size. A good indication is when you poke the dough and the indentation slowly fills back in rather than springing back immediately.
- Shape the rolls.
- Punch down the risen dough to release air bubbles. Divide into 14-16 equal portions and shape each into a tight ball by pulling the edges toward the bottom and pinching to seal. Arrange the rolls in your greased baking pan with sides touching for soft edges or slightly apart for crustier sides.
- Second rise.
- Cover shaped rolls and allow them to rise again for about an hour until noticeably puffy. They won't quite double in size but should fill in the gaps between each other in the pan. This second rise builds flavor and ensures light, airy rolls.
- Bake to golden perfection.
- Place the pan on a lower oven rack at 350°F for 20-25 minutes. The rolls should become golden brown on top and sound hollow when tapped. Immediately brush with honey butter topping while hot for a glistening finish and incredible flavor.
My favorite thing about this recipe is the versatility of the dough. I've used it to make not just dinner rolls but also hamburger buns and even cinnamon rolls with a few adjustments. The entire family gathers in the kitchen when these are baking because the aroma is absolutely irresistible.
Overnight Preparation
Preparing these rolls ahead of time has saved me countless hours during holiday meal preparation. After shaping the rolls, cover them tightly and refrigerate overnight for up to 15 hours. The cold temperature slows down yeast activity without stopping it completely. The next morning, remove them from the refrigerator about 3 hours before baking and let them sit covered at room temperature for 1-2 hours to complete their second rise. This method actually improves flavor as the longer fermentation develops more complex notes in the finished rolls.
Flour Matters
While both all-purpose and bread flour work in this recipe, they create slightly different results. All-purpose flour produces softer, more tender rolls with a finer crumb that practically melt in your mouth. Bread flour with its higher protein content creates chewier rolls with more structure that stand up beautifully to hearty soups and stews. I typically use bread flour during winter months when serving these alongside robust meals, and all-purpose during summer when making sandwich rolls. The measuring technique matters too pour flour into measuring cups and level with a knife rather than scooping directly with the measuring cup which compacts flour.
Serving Suggestions
These versatile rolls complement virtually any meal from casual weeknight dinners to holiday feasts. Slice them horizontally for sliders or small sandwiches. For breakfast, split and toast with a smear of jam or serve alongside eggs. My favorite way to enjoy them is warm from the oven split open with a pat of salted butter slowly melting into the tender crumb. For an elevated experience, mix softened butter with fresh herbs like rosemary and thyme to serve alongside. These rolls also make excellent bread pudding when a few days old simply tear into pieces and soak in your custard mixture.
Common Questions About the Recipe
- → Can I make these dinner rolls ahead of time?
Yes! You can prepare the rolls through the shaping stage, then cover them tightly and refrigerate for up to 15 hours. Remove them from the refrigerator about 3 hours before serving, allowing 1-2 hours for the final rise before baking. Alternatively, you can freeze the shaped dough for up to 3 months and thaw/rise for 4-5 hours before baking.
- → What's the difference between using all-purpose flour and bread flour?
Both flours work wonderfully in this recipe. All-purpose flour is more convenient for most home bakers, while bread flour will produce slightly chewier dinner rolls. The rolls remain soft and fluffy regardless of which flour you choose, and no other adjustments to the recipe are needed.
- → How do I know when my dough has been kneaded enough?
Properly kneaded dough should feel soft but not overly sticky. You can perform two tests: the poke test (poke the dough—if it slowly bounces back, it's ready) or the windowpane test (stretch a small piece until light passes through without tearing). Kneading typically takes about 5 minutes by hand or with a stand mixer.
- → Can I use active dry yeast instead of instant yeast?
Yes, you can substitute active dry yeast for instant yeast in equal amounts. The only difference is that your rise times will be slightly longer with active dry yeast. Both types will produce excellent rolls.
- → What's the best way to store leftover dinner rolls?
Cover leftover rolls tightly and store at room temperature for 2-3 days or refrigerate for up to a week. You can also freeze baked rolls for up to 3 months. To reheat, thaw if frozen, then lightly cover and warm in a 300°F oven for about 10 minutes.
- → Why are my rolls browning too quickly?
Rolls can brown too quickly depending on your oven or baking pan material. Glass pans typically brown more slowly than metal. Always bake rolls on a lower oven rack position, and if you notice the tops getting too dark, loosely tent with aluminum foil for the remainder of the baking time.